An electric fence is an effective tool for securing livestock and deterring unwanted animals. However, to ensure its functionality and safety, it’s crucial to regularly test the electric fence easily. This article provides a step-by-step guide on how to test an electric fence easily and safely, ensuring optimal performance and peace of mind.
1. What is an electric fence?
An electric fence is a sophisticated barrier system designed to control the movement of animals or prevent unauthorized entry into a specific area. It utilizes electrical pulses to create a deterrent effect without causing harm to humans or animals.
The concept behind an electric fence is to create a psychological and memorable shock that discourages animals from attempting to breach the barrier.
The components of an electric fence include an energizer, wires, insulators, grounding rods, and a controller. The energizer, also known as a fence charger or fencer, is the heart of the system
current (DC) battery, solar power, or an alternating current (AC) mains supply.
The wires of an electric fence are typically made of high-tensile steel or aluminum. These wires carry the electrical charge and are strategically placed along the perimeter or within the designated area.
Insulators, made of non-conductive materials such as plastic or ceramic, are used to secure the wires and prevent them from grounding.
To ensure the effectiveness of an electric fence, proper grounding is crucial. Grounding rods are buried in the ground near the energizer, providing a path for the electrical current to flow back into the earth. This completes the circuit and allows the fence to function properly.
The controller, often a control box or keypad, is responsible for regulating and monitoring the electric fence system. It allows the user to adjust the settings, such as the voltage level, pulse duration, and other parameters, to suit specific requirements.
Electric fences are widely used in agriculture, livestock farming, and perimeter security applications. They offer numerous benefits, including cost-effectiveness, flexibility, and ease of installation. Electric fences act as a visual and psychological deterrent, reducing the risk of animal escapes and minimizing damage to crops or property.
In conclusion, an electric fence is a sophisticated barrier system that utilizes electrical pulses to create a deterrent effect. It is an effective and humane method for controlling the movement of animals and securing specific areas.
By understanding the components and principles behind an electric fence, one can make informed decisions regarding its installation, maintenance, and overall effectiveness in various applications.
2. Importance of testing an electric fence
Regularly testing your electric fence is essential for several reasons. Firstly, it ensures that the fence is functioning properly, maintaining its effectiveness in keeping animals contained and intruders out.
Secondly, testing helps identify any faults or malfunctions that may require immediate attention to prevent accidents or livestock escapes. Lastly, testing provides peace of mind, knowing that your electric fence is operating as intended.
Testing an Electric Fence: Step-by-Step Guide
1. Preparing for the test
Before testing your electric fence, take the following preparatory steps:
Gather necessary tools
To test the electric fence, gather the following tools: a digital voltmeter, a grounding rod clamp, a wire cutter, a screwdriver, and safety gloves.
Ensure safety precautions
Ensure your safety by wearing gloves and other necessary protective gear. Never touch the electric fence with your bare hands while testing it.
2. Checking the energizer
The energizer is the heart of an electric fence system. To test it, follow these steps:
Inspect the energizer
Visually inspect the energizer for any physical damage or loose connections. Ensure it is securely mounted and protected from the elements.
Measure the output voltage
Using the digital voltmeter, carefully measure the output voltage of the energizer. Follow the manufacturer’s instructions for proper measurement techniques. Ensure the voltage reading is within the recommended range for your specific fence.
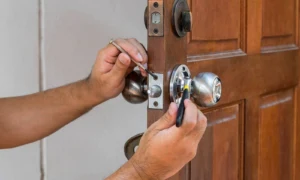
3. Inspecting the wires and connections
The wires and their connections play a vital role in the fence’s functionality. Here’s how to inspect them:
Check for physical damage
Inspect the wires for any signs of wear, corrosion, or breaks. Replace any damaged wires promptly to maintain the fence’s integrity.
Examine the connections
Ensure all wire connections, including the wire-to-wire and wire-to-insulator connections, are secure and free from rust or corrosion. Loose connections can weaken the fence’s performance.
4. Testing the ground system
A properly functioning ground system is crucial for an effective electric fence. Follow these steps to test it:
Inspect grounding rods
Inspect the grounding rods to ensure they are firmly installed and not damaged. Replace any compromised rods to maintain proper grounding.
Measure the grounding resistance
Using the grounding rod clamp and the digital voltmeter, measure the grounding resistance. A low resistance reading indicates a well-grounded fence system.
Conclusion
Regularly testing your electric fence is essential for maintaining its effectiveness and ensuring the safety of both your livestock and property.
By following the step-by-step guide provided in this article, you can easily and safely test your electric fence. Remember to always prioritize safety and promptly address any issues or malfunctions that arise during testing.